

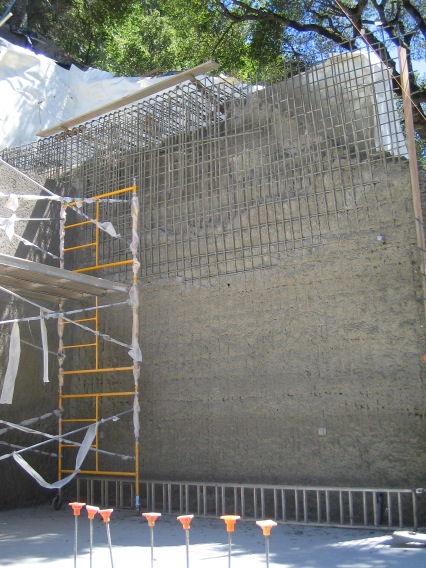
Last week, the rebar was completed up the walls, nearly to the third floor, and Wednesday was shotcrete day. Nancy and I had to miss it because of our mediation meeting with our original contractor, and all I can say (because the agreement is confidential) is that we have a mediated solution, and we are going ahead and proceeding with the project. Here is what the site looked like before shotcrete application, after all waterproofing, rebar, and wood shoring was done.

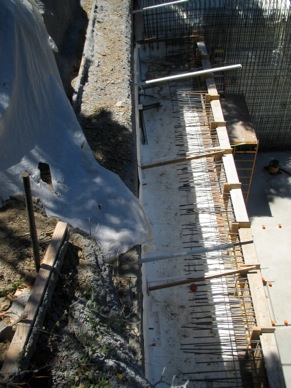
On the left, you can see all the rebar, and the wood shoring that is going across the front of the shelf in the back wall. This shoring (which is not level on the bottom – remember the shoring wall shelf is 9” out of level) allows the crew to form the shotcrete wall up the back all the way to the tiebacks. Then they will remove the wood, and pour concrete into the space behind the shotcrete wall to create the structural shelf, enclosing the tiebacks. This picture on the right shows the space behind the wood shoring, with tiebacks protruding just over the wood, where the structural shelf will be formed. This big thick beam of concrete, around the tiebacks, makes the back wall extremely strong.
So shotcrete was applied on Wednesday, and results are mixed. Everything went well on the left side, as you can see in the photo at the top of the page. The garage walls are nicely finished, conduit and junction boxes are embedded in the walls properly, and everything looks straight. But the right side didn’t go quite as well.

Here you can see that the right side wall was left incomplete. As the shotcrete was applied, the top of the rebar cage started bending downward a bit. Brent and his crew immediately stopped, and removed the excess material so that the cage could be bent back into place. the net result is that the wall was left unfinished.This photo on the right, taken looking straight in, parallel to the wall, shows how the top is leaning out a little. Brent says that this is still within the limit of the wall, and that they will come back on July 5th and finish applying the shotcrete to make a smooth wall, complete the top and the upper shelf on this wall, and also complete a finished wall on the back side of the garage.
Brent said another thing that was interesting. Shotcrete hardens quickly, and they had to work very fast to remove the stuff before it set up. They worked late to remove the excess so that the bars could be bent back, and he commented that every minute they spent removing the shotcrete before it hardened saved them hours of effort later on. By clearing the shotcrete away before it got hard, they didn’t have to spent a lot of time with pneumatic tools getting the hard material out to bend everything back into position. They also had to protect the garage floors, so bits of concrete wouldn’t get stuck to the nice smooth surfaces!