
There was a computer game in the ‘70’s called “adventure”, where you could get lost in “a maze of twisty passages, all alike”. I’ve felt like I’m lost in a maze of twisted details, but today I stumbled out and found the gold nuggets. After several weeks of hard work by everyone, and dozens of issues to resolve, our house passed the “rough in” inspection today. We are installing the insulation and sheetrock next week. Pardon me, but…YEEEHA! Kudos to Bob Hartwell, Tony Mowers, Rick Hayward from Lackett Electrical, Craig from Peter Levi Plumbing, and Brent Harris’ crew. They’ve all worked hard.
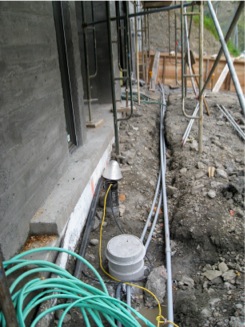
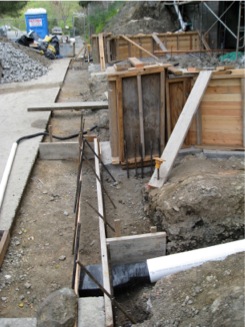
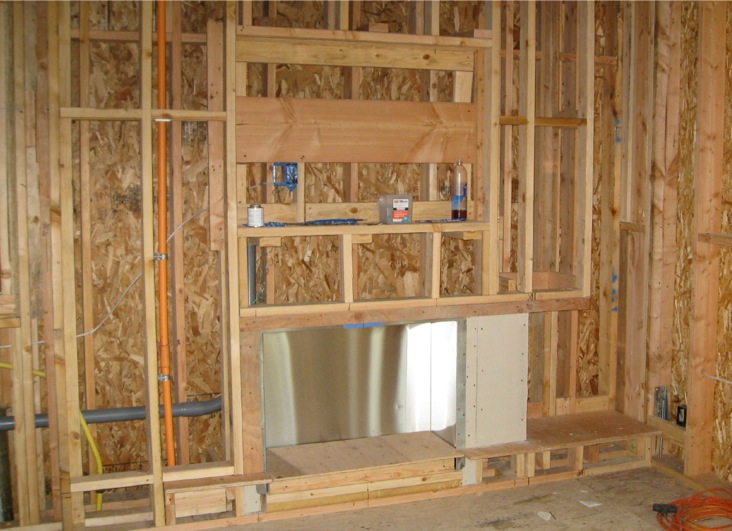
Some of the details keeping us all busy: besides the alcohol fireplace in the living room (go to http://ecosmartfire.com for details) we added framing and conduits for a home entertainment system, blocking for hanging pictures and towel racks, conduit for telephone, cable TV and yard lighting, forms for the small retaining walls and curb around the driveway, and completed the drainage system. And the plumbers and electricians completed their work. This pic shows a concrete driller cutting one of the 4” holes in our garage wall for the 2nd floor deck drains. Next are shots of the conduit and drain pipe in the front of the house, and the retaining wall forms.
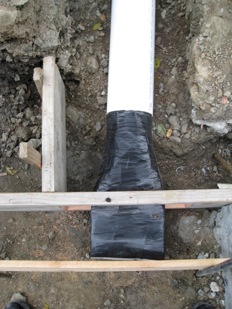
Here are details I’m personally proud of. We needed to make a slot opening in the curb for the 6” drains from behind the house and wing walls. How were we going to convert the 6” PVC pipe into a slot shape? I got a bunch of foam, and carved it by hand to form the shape we needed, 6” round on one end, 3 x 9” rectangle on the other. Then I wrapped it in black duct tape. You see it here, stuck in the end of the drain pipe, fit into the form for the curb. When we pour the new curb, we’ll add extra concrete around the foam shape and the 6” pipe. Then we can reach in through the opening in front, and dig the foam and tape out, leaving the drain slot open.
We also completed the final telephone hookup, asked several glass vendors to bid on our glass rail in the living room, picked up the last kitchen cabinets, got the copper gutter on the roof deck shortened so there is enough room for stucco around the ends, and of course, continued painting the railing and spiral stair. All railing now has the first coat on it, and if the weather permits, we’ll do the second coat this weekend. And, my friend George finished putting clear coat on all doors and windows.

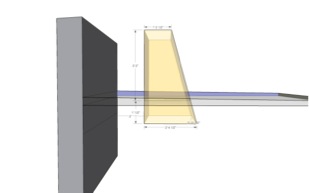
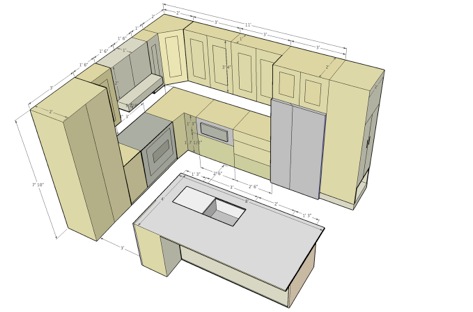
Here are some of my sketches (thanks to Google SketchUp, a great freeware tool) of house details. I work on these late at night, in my spare time 🙂 This is our master bathroom vanity, surface-mounted sink with LaCava Waterblade faucet and lighted mirror. On the right is a side view of the skylight tower over our stairwell, showing the roof deck across the middle. I used the Golden Ratio to size the bottom opening, giving balanced proportions. The skylight had to be mounted 36” above the deck to meet code.

This was used to get bids on the glass railing around the top of the stairs, next to the living/dining room. I drew the 4 x 8’ beams underneath the floor, to show how it will be mounted.